
Pelvic Girdle Pain in Pregnancy
17 Sept 2026 · 21 min read
On this page54 sections
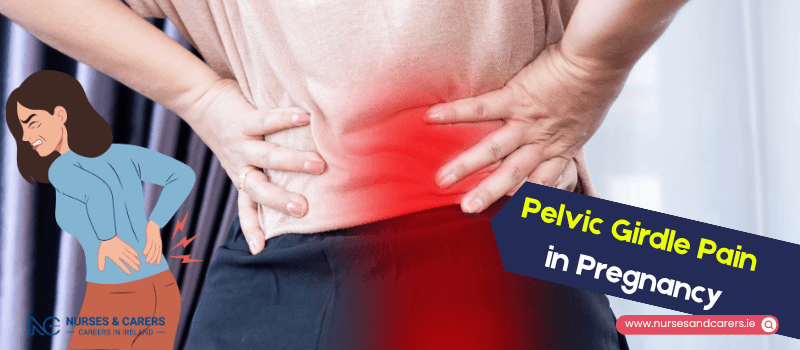
Pelvic girdle pain (PGP) refers to discomfort felt around the pelvic joints, lower back, hips, and thighs. It affects approximately 1 in 4 pregnant individuals. The severity varies from mild discomfort to debilitating pain that directly restricts daily physical activities.
Symptoms and Presentation
Pelvic girdle pain can manifest as sharp, dull, or aching discomfort in one or multiple anatomical locations:
Directly over the pubic bone at the front of the pelvis (symphysis pubis).
Radiating along the groin area or below the lower abdomen.
Isolated within one or both hips.
Across one or both sides of the lower back, sacroiliac joints, or buttocks.
Functional Mobility Restrictions
Inflammation in the pelvic joints often makes specific movements difficult or painful:
Walking or standing for extended periods.
Bearing weight on one leg at a time (e.g., climbing stairs, dressing, or stepping out of a bath).
Parting your legs (e.g., getting in and out of a vehicle).
Turning over or changing positions while in bed.
Lying flat on your back or resting comfortably on your side.
Causes and Structural Triggers
Pelvic girdle pain does not stem from a single flaw, but rather from a combination of mechanical, hormonal, and lifestyle factors during gestation:
Pregnancy Hormones: Hormones like relaxin soften and increase the sensitivity of your ligaments to prepare the birth canal, reducing structural joint stability.
Joint Irritation: As your movement patterns and muscle recruitment change to compensate for a shifting center of gravity, the pelvic joints can become unevenly strained and irritated.
Mechanical Strain from the Fetus: The physical weight of the growing baby changes your posture, strains your core musculature, and applies direct downward pressure on the pelvic ring.
Neurological Sensitivity: Chronic stress, anxiety, or physical exhaustion (fatigue) directly alter how your nervous system processes pain signals, amplifying your perception of discomfort. Getting high-quality sleep typically desensitizes these nerve paths and eases the pain.
Prior Medical History: Individuals with a pre-existing history of lower back or pelvic injuries are highly susceptible to developing PGP during pregnancy.
Underlying Risk Factors
Your baseline probability of experiencing pelvic girdle pain accelerates if your health profile includes pre-pregnancy obesity, gestational diabetes, or a low baseline level of physical fitness prior to conception.
When to Seek Professional Medical Help
Schedule a Non-Urgent Review if:
Your pelvic or lower back pain actively interferes with your normal daily routines, sleep, or mobility.
The discomfort fails to show clear improvement after 1 to 2 weeks of rest.
Note: Discuss your symptoms with your midwife, obstetrician, or GP. They can provide an initial clinical evaluation and refer you directly to a specialized women's health physiotherapist for targeted treatment, pelvic support bands, and safe manual therapies.
Pelvic Girdle Pain in Pregnancy: Managing Daily Activities
You can successfully manage pelvic girdle pain (PGP) and prevent joint irritation from worsening by pacing your daily habits and altering how you move your body. The core objective is to minimize uneven mechanical strain across your pelvic ring.
If structural adjustments fail to bring relief, a women's health physiotherapist can provide manual therapy to release tight muscles, realign joints, and prescribe specialized abdominal or pelvic support binders. For severe, unmanageable pain, consult your GP or obstetrician to explore pregnancy-safe pharmacological pain management options.
Posture and Body Mechanics
Baseline Alignment
Equal Weight Distribution: When standing, always maintain equal weight through both feet. Avoid leaning or shifting all your weight onto a single hip.
Footwear Choices: Wear highly supportive, cushioned flat shoes. Completely avoid high heels, as they tip your pelvis forward and aggravate lower back compression.
Ergonomic Sitting Protocols
Find the Midpoint: Do not slouch forward or arch your back too straight. Aim for a relaxed, neutral posture halfway between these two extremes.
Use Lumbar Support: Place a small cushion or a tightly rolled towel behind the small of your lower back to preserve your spinal curve and prevent slouching.
Sit Fully Back: Sit deep into the seat to utilize the full support of the chair’s backrest. Do not perch on the front edge of the cushion, as this rapidly exhausts your pelvic stabilization muscles.
Computer and Desk Ergonomics
Bring Controls Closer: Slide your chair completely under the desk or bring your keyboard closer to your torso so your upper arms rest naturally by your sides while typing.
Adjust Screen Height: Elevate or lower your monitor so the top of the screen sits directly at eye level, preventing neck and upper-spine strain.
Navigating Mobility Obstacles
Driving and Vehicle Transitions
Seat Adjustments: Slide your car seat closer to the steering wheel so your feet comfortably reach the pedals without stretching or forcing you to slouch.
Exiting the Vehicle safely:
Slide your seat completely back to maximize physical legroom.
Move your feet slowly, one at a time, turning your entire torso toward the open door while keeping your knees tightly together.
Place both feet firmly on the ground outside.
Lean your upper body forward and push up using your leg muscles. Use the overhead door handle for physical leverage if needed.
Managing Stairs (The "Step-by-Step" Method)
If climbing stairs triggers acute pelvic or groin pain, conquer them one single step at a time rather than walking fluidly:
Ascending (Going Up): Step up first with your less painful leg, then bring your other leg up to meet it on the same step. Lead with the stronger side.
Descending (Going Down): Step down first with your more painful leg, then bring your stronger leg down to meet it on the same step. Secure yourself by holding the bannister firmly.
Lifting, Housework, and Managing Small Children
Avoid Heavy Housework: Completely delegate high-exertion domestic chores, such as vacuuming, pushing heavy shopping trolleys, or lifting bulky laundry baskets.
Sit for Routine Tasks: Sit on a tall stool or chair while ironing, folding clothes, or chopping food to minimize standing stress.
Ergonomic Lifting Technique: If lifting is unavoidable, stand with your feet side-by-side, bend deeply at your knees, and keep your spine straight. Avoid stooping, twisting, or bending from the waist.
Childcare Adjustments: Never bend over or stoop down to lift a small child. Instead, sit down on a chair or kneel on the floor to comfort them. Encourage toddlers to climb up into your lap or crawl into their car seats independently rather than lifting them yourself.
Sleep and Bed Transitions
Optimizing Your Sleep Layout
Lateral Alignment: Lie flat on your side with a thick pillow tucked firmly between your knees and ankles to keep your hips parallel and prevent spinal twisting.
Bump Support: As your abdomen expands, place a small, rolled towel or a wedge pillow directly under your bump to relieve pulling strains on your hips.
Soften a Firm Mattress: If your hips feel deeply bruised or aching in the morning, your mattress may be too rigid. Layer a doubled-over single duvet or a plush memory-foam mattress topper over your bedding to cushion your joints.
Pain-Free Bed Rotations
🛌 HOW TO TURN IN BED (The "Log Roll"):
1. Bend both knees up toward your buttocks, placing your feet flat on the mattress.
2. Engage your deep core/tummy muscles and squeeze your knees tightly together.
3. Roll your shoulders, torso, and hips simultaneously in ONE unified movement.
Do not twist your spine or let one leg lag behind the other.
How to Get Out of Bed safely
Complete your log roll onto your side, facing the edge of the mattress.
Gently drop your lower legs over the side of the bed.
Simultaneously use your lower elbow and upper hand to press your upper body sideways into an upright, sitting position.
Reverse this exact sequence step-by-step when you are entering the bed at night.
Pelvic Girdle Pain in Pregnancy: Exercises to Help
These gentle, low-impact stretching and activation exercises are designed to alleviate joint stiffness, relieve lower back pressure, and support your pelvic structure.
Key Execution Rules
Prioritise Comfort: These movements should feel soothing and comfortable. They must never cause physical pain.
Hold and Replicate: Aim to hold each active stretch for 5 to 10 seconds. Repeat each movement 4 to 5 times.
Manage Discomfort: If you experience any physical twinges or joint catching, modify your technique: reduce the depth of the stretch, execute the movements more gently, and decrease the duration of the hold.
Mobility and Flexibility Exercises
1. Pelvic Tilts (Warm-Up)
This movement stretches the lumbar spine and un-locks a stiff pelvis. It serves as an excellent warm-up before progressing to other exercises.
Setup: Sit completely upright on a firm chair, gym ball, or birthing ball.
Extension: Sit as tall as physically possible, gently accentuating the natural curve in your lower back while placing your hands on your knees.
Flexion: Slowly slouch your torso forward, rolling your weight backward onto your tailbone to round your lower back. Alternately shift between these two positions.
2. Pelvic Circles
This exercise enhances rotational flexibility around the hip joints and pelvic ring.
Setup: Sit squarely on an inflated gym or birthing ball.
Action: Keeping your upper body relatively stable, move your pelvis to roll the ball in a small, smooth circle underneath you.
Reversal: Complete a few slow rotations in one direction, then smoothly reverse the path to circle in the opposite direction. Start with tiny movements and expand the circle as your comfort increases.
3. Inner Thigh (Adductor) Relaxation
Tight inner thigh muscles can unevenly pull on the pubic bone, triggering hip and groin pain. Keeping these muscles loose improves your baseline mobility, which is highly beneficial during labour.
Setup: Sit securely on the absolute edge of a bed or chair.
Action: Step your feet firmly apart as wide as is comfortably tolerable.
The Stretch: Keep your legs relaxed. Place your hands on the inner surfaces of your knees and press them gently outward until you feel the baseline tension ease along your inner thighs.
Spinal and Pelvic Decompression Stretches
1. Cat-Cow Stretch
This classic movement opens up the mid-back and allows the physical weight of your baby to fall forward, instantly taking downward pressure off your lower back.
Setup: Assume an all-fours position on a yoga mat or a firm bed, placing your hands directly under your shoulders and your knees directly beneath your hips.
Cat Phase: Push firmly through your hands, round your shoulders, and tuck your chin slightly to arch the middle of your back up toward the ceiling.
Cow Phase: Slowly reverse the movement, dropping your spine back into a neutral, aligned position while gently lifting your head. Do not over-extend your lower back.
2. Child's Pose Stretch
A deeply therapeutic position to relieve acute lower back, pelvic, and gluteal (bottom) aching.
Setup: Kneel on a mat or mattress. Widen your knees significantly to create ample structural space for your bump.
Comfort Modification: Place a soft pillow behind your knees to sit your bottom comfortably back onto your heels. If reaching the floor is difficult, stack pillows in front of you to lean on.
Action: Keeping your bottom securely anchored to your heels, slowly slide your hands forward across the floor as far as comfortably possible to extend your spine.
3. Advanced Child's Pose Variations
Asymmetrical Side Stretch: Assume the basic child's pose position. To decompress a painful right side, reach your right hand over across your left arm and hold. Alternate sides to target localized lower back or groin pain on one side.
Gym Ball Extension: Rest your hands on top of an inflated birthing ball while in a kneeling child's pose setup. Slowly roll the ball forward to deepen the stretch through your shoulders and upper back. Gently angle the ball to the left or right to target opposite sides of your spine.
Seated and Core Stabilization Exercises
1. Seated Side Stretch
A simple side-opening exercise that can be executed routinely while sitting throughout the day.
Setup: Sit up straight and tall on a firm chair.
Action: To stretch your left side, raise your left arm straight overhead and reach it comfortably across toward the right side.
Breathing Technique: Take a slow, maximum inhalation from your chest to deepen the rib stretch, then exhale smoothly as you lower your arm back to the starting position. Repeat using your right arm.
2. Deep Lower Tummy Activation
Your deep transversus abdominis muscles act as a natural internal corset. Strengthening them helps lift and support the physical weight of the fetus, significantly reducing mechanical strain on your pubic bone and lower back joints.
Setup: Place both of your hands flat on your lower abdomen, resting just below your belly button.
Execution: Take a normal breath in. As you exhale, gently and slowly draw your lower abdominal muscles inward, pulling them away from your hands.
Maintenance: Hold this gentle muscle contraction for 10 seconds while continuing to breathe regularly. Do not hold your breath.
Pelvic Girdle Pain in Pregnancy: Looking After Yourself
Pain Relief and Comfort Modalities
1. Targeted Thermal Therapy
Applying localized heat increases blood circulation and relaxes hyper-reactive muscles surrounding the lower back, hips, glutes, and groin.
Methods: Use a commercial heat pack, a hot water bottle wrapped in a towel, or take a warm shower or bath.
Application Rules: Wrap hot packs in a clean cloth to prevent skin burns. Apply for a maximum of 20 minutes per session. The sensation should be soothing, not intensely hot.
🚨 Safety Constraints:
Do not use heat therapy during the first trimester (0 to 12 weeks of pregnancy).
Never apply a direct heat source over your baby bump.
Prevent systemic overheating by ensuring your bathroom is well-ventilated and keeping a glass of water nearby, especially during a warm bath.
2. Specialized Trigger Point Release (Myofascial Massage)
As your posture shifts during pregnancy, specific stabilizing muscles are forced to overwork. This stress creates hyper-irritable nodes (tender trigger points) that can radiate pain down your thighs and lower back. You can safely release these tight bands at home using a tennis ball or a spiky massage ball:
Position the ball between your gluteal muscle (buttock) or lower back and a firm wall. Do not place the ball directly over your spine.
Slowly lean your body weight into the wall, moving until the ball isolates a distinctly tender point in the muscle.
Maintain steady, firm pressure on that exact sore spot while practicing slow, deep diaphragmatic breathing. Deep breathing desensitizes the nervous system and triggers tissue release.
Hold the static pressure continuously until you feel the localized ache dissolve, which typically takes approximately 30 seconds.
Move the ball to the next tender zone. Systematic check-ups should cover both buttocks and both sides of the lower back, as hidden trigger points often form on the non-painful side.
3. Structured Relaxation Pauses
Chronic physical pain overstimulates your nervous system, lowering your baseline pain threshold. Dedicate brief periods daily to sit or lie in a quiet, distraction-free space. Focus exclusively on long, deep inhalations and smooth exhalations, utilizing guided prenatal meditation soundtracks or podcasts to help quiet your body's stress responses.
4. Ground-Reaction Support (Footwear)
Your feet dictate the alignment of your knees, hips, and pelvis. To protect your pelvic joints from jarring forces, wear structural running shoes featuring a cushioned sole and a gentle built-in arch support. Do not walk barefoot and avoid unsupportive flat slippers, as they lack the impact absorption required to protect a unstable pelvis.
Calibrating Fitness and Exercise Limits
Maintaining cardiovascular fitness during pregnancy helps prevent gestational diabetes and can shorten the second stage of active labour. However, when navigating pelvic girdle pain, your physical activity must be modified to prevent joint shearing.
PRENATAL ACTIVITY MODIFICATIONS | |
RECOMMENDED OUTLETS | STRICTLY CONTRAINDICATED |
• Hydrotherapy / Swimming | • High-impact training |
• Symmetric Prenatal Yoga | • Running / Jogging |
• Prenatal Pilates | • Single-leg weight bearing |
1. Walking Adaptation
Listen directly to your body's feedback. If you experience an escalation of pelvic or groin aching during or after a walk, minimize your walking volume strictly to necessary daily transit. If walking remains pain-free, stay well within your comfort zone and decrease your stride length as your pregnancy advances.
2. High-Impact Constraints
Do not run, jog, or participate in any high-impact exercise classes. The repetitive bounding forces place extreme stress on an already sensitive pubic symphysis and sacroiliac joints.
3. Hydrotherapy and Swimming
Water buoyancy removes the downward force of gravity, unloading your joints while allowing you to maintain cardiovascular fitness.
Stroke Isolation: Front crawl or simple water-walking can be highly therapeutic. However, different swimming styles can stress the pelvis differently.
Testing Protocol: To isolate potential triggers, practice only one specific stroke per swimming session. If a particular stroke causes joint catching or pain, eliminate it from your routine.
4. Modified Prenatal Yoga
Yoga can significantly assist with mind-body connection and labor breathing techniques. However, asymmetric stances—where your body weight is shifted onto a single leg, or where your legs are spread excessively wide—will slide your pelvic bones out of alignment and trigger sharp pain.
Adjustment Rule: Modify all poses to keep your feet closer together, ensuring your body weight remains perfectly and evenly distributed across both legs.
5. Prenatal Pilates
This is highly recommended for PGP management. Structured prenatal pilates safely targets your deep pelvic floor, transverse abdominals, and gluteal complexes, improving your baseline posture and maintaining deep core stability without straining the joints.
Pelvic Girdle Pain: Labour, Birth, and Postpartum Planning
The vast majority of individuals experiencing pelvic girdle pain (PGP) can achieve a completely normal vaginal delivery. Clinical evidence demonstrates that undergoing a planned Caesarean section does not offer therapeutic advantages or improve outcomes for patients with PGP.
To ensure a positive birthing experience, the primary objective is to manage the physical distance your legs are spread (abduction) and avoid positions that lock your sacrum. Practice alternative birthing positions throughout your third trimester, and formally document your comfort preferences within your birth plan.
Intrapartum Strategies: The First Stage of Labour
The first stage spans from the onset of true labour contractions until the cervix reaches full dilation (10 cm). Remaining mobile and maintaining upright postures unloads the pelvic joints, relieves lower back strain, and utilizes gravity to guide the baby's head deep into the pelvic ring.
1. Symmetrical Upright Support
If walking triggers acute groin or hip pain, avoid standing transit. Instead, maintain an upright position using these stable alternatives:
The CUB Support: Utilize a Comfortable Upright Birth (CUB) support. This rigid, horseshoe-shaped inflatable structure provides exceptional stability compared to a standard round ball.
Seated Forward Leans: Sit fully back on a sturdy chair or straddle the backrest, leaning your upper body forward onto a stack of pillows placed on a table or high bed.
Sustained Micro-Movements: Keep your pelvis tracking fluidly by gently swaying your hips side-to-side while standing, or rhythmically rocking while seated on a birthing ball.
2. Positions for Acute Back or Pubic Pain
The All-Fours Position (Quadruped): Kneeling on your hands and knees shifts the entire physical weight of the fetus forward, away from your spine, tailbone, and sacroiliac joints. This symmetrical position is highly recommended if you suffer from severe pubic bone pain (symphysis pubis dysfunction), as it naturally keeps your knees aligned and eliminates painful leg parting.
The Peanut Ball: If you choose an epidural or need to rest on your side, place a peanut-shaped birth ball securely between your thighs and ankles. This structural support keeps your hips perfectly parallel, widens the pelvic outlet, and helps advance labour without causing joint misalignment.
Delivery Strategies: The Second Stage of Labour
The second stage encompasses active pushing, spanning from full cervical dilation until the birth of your baby.
⚠️ CRITICAL POSITIONING WARNING:
Avoid giving birth flat on your back (lithotomy position) with your legs pulled back in stirrups. This position completely locks your sacroiliac joints, places immense pressure on your tailbone, and severely hyperextends an already sensitive pubic bone.
Recommended Birth Positions
Supported Quadruped: Remain on your hands and knees on the delivery bed. You can elevate the head of the bed to a vertical position and lean your chest comfortably against it while pushing.
Lateral (Side-Lying) Position: Lie flat on your side, keeping your spine straight. Ensure your upper leg is fully supported by pillows, a mechanical footrest, or a peanut ball. This position is highly effective for patients managing an epidural, as it prevents the dead weight of the leg from twisting the pelvic joints.
Postpartum Care and Recovery Protocols
Joint instability does not instantly vanish upon delivery; your ligaments remain influenced by pregnancy hormones for several weeks postpartum.
Prioritize Proactive Analgesia: Request regular, scheduled pain relief from the ward nursing staff early. Managing your baseline pain effectively prevents muscle guarding and helps you move cleanly.
Minimize Transit Distances: Request a hospital bed located immediately adjacent to the bathroom to reduce unnecessary walking during your initial recovery.
Supervised Initial Mobility: If you received an epidural, do not attempt to stand or walk independently for the first time. Always ensure your midwife is present to assist you and verify that your leg strength has fully returned.
Ergonomic Feeding Posture: Whether breastfeeding or bottle-feeding, never stoop, slouch, or lean forward over your baby. Sit deep into a supportive chair, place a firm pillow under your elbows to bring the baby up to your chest level, and ensure your lower back remains fully supported.
Managing Future Pregnancies
Pelvic girdle pain carries a high rate of recurrence in subsequent pregnancies. While the pain can present with a similar intensity, it can also manifest much more mildly if your body is structurally prepared.
Proactive Preventive Actions
Continue performing your prescribed deep core and pelvic stabilization exercises between pregnancies to build a strong baseline framework.
As soon as you confirm a subsequent pregnancy, request an immediate, early referral from your GP or midwife to a specialized women's health physiotherapist before PGP symptoms initiate.
Disclaimer
The information provided here is for educational and informational purposes only. It does not constitute medical advice, diagnosis, or treatment. Always consult a qualified healthcare professional or your GP for specific medical concerns, diagnoses, or health advice. Never disregard professional medical advice or delay seeking it because of information you have read here.